
We'll want to document our code and our APIs. What's stopping us is usually time or that we know that the documentation and the actual code will drift and that's just worse than no documentation at all. So we need something that changes with us, that something is Swagger, the fact that it enables you to run queries against it is an added bonus.
This is what it can feel like sometimes with documentation. You spend all this time writing documentation and then someone, might be you, might be your colleague does a change and suddenly, you are out of sync, feels like a struggle, no?

Swagger is live documentation though, it changes as the code changes. So hopefully you will give it a shot after reading this article.
In this article, we will show how easy it is to set up Swagger in your Nest.js app. It's just one config place and a few DTOs that needs documenting.
We will show the following:
- Scaffolding a Nest.js app and some needed artifacts like modules, services, DTOs
- Setting up Swagger and see how easy it is to get your endpoints documented
- Exploring Swaggers features like executing queries and inspect results
- Improving our documentation even more by adding decorators to our DTOs.
Resources
Scaffolding our Nest.js project
Let's create a new Nest.js project by using the excellent Nest CLI. If you haven't got it installed go and do so by running the following command in the terminal:
npm i -g @nestjs/cli
Done?
Ok, good. Let's continue.
To create a nest project we just have to call nest new [project name] so lets do just that:
nest new swagger-demo
It should look like this:

Next step is to set up a route. Let's do this in a modular way and create a module, service and a DTO. Lots of typing you say? No not really as we are using the CLI. Let's check what the CLI can do with:
nest --help
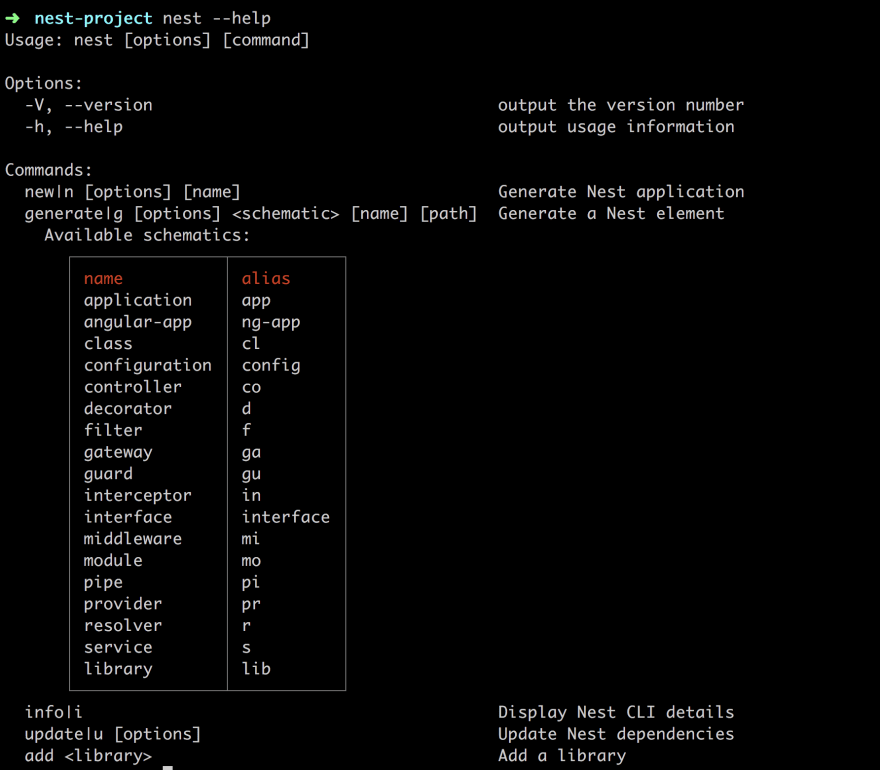
It's telling us to type pretty much:
nest generate|g [options] <schematic> [name] [path]
Sounds a bit cryptic but to create a module we would need to type:
nest g mo cats

We need a controller as well that will respond to our requests. So that would be:
nest g co cats

For a service we would type:
nest g s cats

Note two things about the controller + service creation. They are created under the cats directory, they come with tests :) and they have both registered themselves with the module, look at the UPDATE row at the bottom row.
Lastly, we want to create a DTO, a data transfer object that will hold our properties. We do that by typing the following:
nest g cl cat cats
Before we run this let's discuss what we are typing. We are saying to create a class cl, called cat under path cats. We do this to ensure that all related things end up in one place.

Making the route work
So far we have a bunch of files, but we need the route to work so we need to do the following:
- Add
idandnameto our cat model - Ensure the Service has a
getCats()method that returns a list of cats - Make the controller inject the
catsservice and callgetCats() - Take our API for a spin and ensure
/catswork
Adding id and name to our Model
Ensure src/cats/cat.ts looks like this:
export class Cat {
  id: number;
  name: string;
}
Update our Service
We need to add two methods getCats() and createCat(), this will ensure once we add Swagger on this that we have a GET and a POST request.
import { Injectable } from '@nestjs/common';
import { Cat } from './cat';

@Injectable()
export class CatsService {
  cats: Array<Cat> = [{ id: 1, name: 'Cat'}];

  getCats() {
    return this.cats;
  }

  createCat(cat: Cat) {
    this.cats = [ ...this.cats, {...cat}];
  }
}
Make Controller use the Service
Our controller should look like this:
import { Controller, Get, Post, Body } from '@nestjs/common';
import { CatsService } from './cats.service';
import { Cat } from './cat';


@Controller('cats')
export class CatsController {
  constructor(private srv: CatsService) {}

  @Get()
  getCats() {
    return this.srv.getCats();
  }

  @Post()
  createCat(@Body() cat: Cat) {
    this.srv.createCat(cat);
  }
}
The above simply ensure we are using our CatsService for either getting a list of cats or for adding a cat.
Take it for a Spin
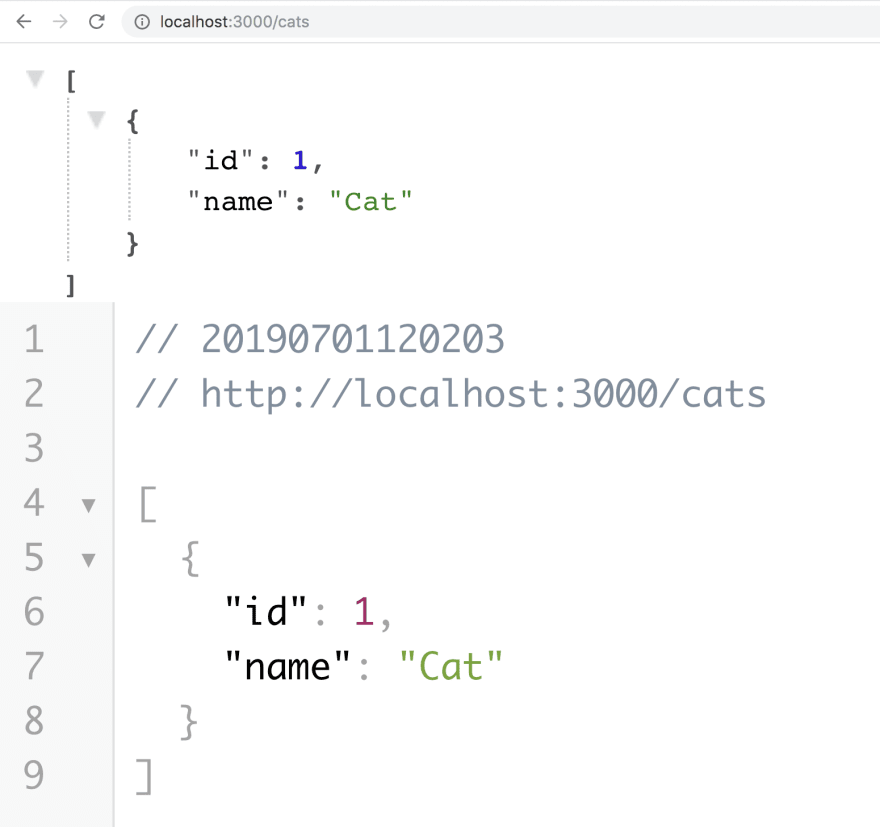
We need to ensure our route works before we start showing Swagger. So run:
npm start
and head to the browser on http://localhost:3000/cats. It should look like so:
Adding Swagger
Now we will add Swagger. To get Swagger to work we need to do the following:
- Install the needed dependencies
- Configure our bootstrap to start using Swagger
- Ensure Swagger is rendering in the browser
Installing Swagger
We need to install through the NPM with the following command:
npm install --save @nestjs/swagger swagger-ui-express
That should set us up nicely, now to our next step, configuring it.
Configuration
Head to main.ts our bootstrap file. In our bootstrap() method it currently looks like so:
async function bootstrap() {
  const app = await NestFactory.create(AppModule);

  await app.listen(3000);
We need to add the following between us declaring app and calling listen() on it, namely:
  const options = new DocumentBuilder()
    .setTitle('My API')
    .setDescription('API description')
    .setVersion('1.0')
    .build();
  const document = SwaggerModule.createDocument(app, options);
  SwaggerModule.setup('api', app, document);
First, we create an options object that gets a title, description, version and finally we call build() which ends up creating an options object. Thereafter we create a document instance by calling createDocument() on a SwaggerModule. It takes our app instance and the options object we just created. The last thing we do is calling setup() on the SwaggerModule. The first argument is a path, which means we will found our API docs under http://localhost:3000/api. The next argument is our app and the last argument is the document instance. Our main.ts should now look like this in its entirety:
// main.ts

import { NestFactory } from '@nestjs/core';
import { SwaggerModule, DocumentBuilder } from '@nestjs/swagger';
import { AppModule } from './app.module';

async function bootstrap() {
  const app = await NestFactory.create(AppModule);

  const options = new DocumentBuilder()
    .setTitle('My API')
    .setDescription('API description')
    .setVersion('1.0')
    .build();
  const document = SwaggerModule.createDocument(app, options);
  SwaggerModule.setup('api', app, document);

  await app.listen(3000);
}
bootstrap();
Trying out the docs
Lets first start up our app
npm start
Thereafter head to http://localhost:3000/api. Then you should see the following:

This is as expected. We have the default route / set up in the app.controller file. We also have a GET for /cats and a POST also for /cats. So far so good.
The million dollar question then, does it work? Well, let's start with GET and /cats

Click the Try it out button. At this point, it will show the Execute button, click that as well. It should give you the below

It answers with our list of cats. We also get a nice cURL version, if we want to use that instead. We can also see the exact response headers we get back, should we want to verify that.
What about our POST request? Well, let's click that instead and our Try it out.

We get a big edit window in which we type some JSON that corresponds to a new cat we want to create so:
{
  "id": "2",
  "name": "cat2"
}
Hitting our Execute button gives the below response:

As you can see we get a 201, which means we have a new cat. Lets ensure that is the case by hitting our GET /cats in Swagger:

Success, there are now two cats. Let's look at how we can improve next.
Improve our docs
If we scroll to the bottom of our Swagger docs page we have a category Models. It contains Cat our DTO class. It's completely empty though and that makes for sad reading. We can easily fix this though.

What we need to do is to use the decorator @ApiModelProperty() and apply those to every property of Cat, like so:
Your cats/cat.ts should now look like this:
import { ApiModelProperty } from "@nestjs/swagger";

export class Cat {
  @ApiModelProperty()
  id: number;

  @ApiModelProperty()
  name: string;
}
Let's our app again:
npm start
and go to http://localhost:3000/api and scroll to the bottom:

There we are, now our class properties are included in the docs as well
Summary
That's it. We got a chance to use lovely Nest again. This time we used a few more commands to learn to scaffold all the files we needed. Most of all we learned how to document our API with Swagger. Documentation that changes as the code changes are worth keeping around. So gift your API some docs as well.


Top comments (4)
i don't know how to show a custom type like below:
type ExamDto{
exam1: string;
exam2: number;
}
@ApiModelProperty()
id: ExamDto[];
Can you show me how to display detail id with properties of ExamDto ? Thank a lots <3
can't be done on types I'm afraid. It's impossible to reflect Types on TypeScript in runtime. If you can, I recommend using classes
Thanks! This article helped me :)
import { ApiProperty } from "@nestjs/swagger";
export class Cat {
@ApiProperty()
id: number;
@ApiProperty()
name: string;
}